A wedding represents a huge milestone in a couple’s life together and photos are a vital way to document and relive this momentous occasion. While a professional photographer will definitely capture the big, posed shots at your celebration, it’s impossible for one person to get all of the small, candid moments that occur throughout the day.
Your guests, however, will no doubt catch these candid moments with their phones. Whether it’s the selfie your mom took of the two of you getting ready, the sweet photo Uncle Mike got of the ring bearer and flower girl dancing together, or the hilarious shot a groomsman took of your bestie catching the bouquet toss, these intimate and emotional snapshots should be collected and shared with others.
This is where Shared Albums on Memento can help. Memento’s photo sharing app lets you easily collect and share pictures and videos from your wedding guests with one simple link, for free. Contributors don’t need to download an app to participate (and you don’t need to hassle anyone to email or text you their photos!).

A Shared Album is a great alternative to The Knot’s now defunct picture sharing app, and – with unlimited storage – is a better photo sharing website than WedUploader, which has a limited storage capacity based on how much “stuff” you have in your Google Drive.
With a link or QR code, Shared Album contributors can upload (and download) photos to your album from any device. You can choose to review and approve photos before they appear in the album, create a customized slideshow, and only share the album with people you choose. Best of all, Shared Albums are completely free!
How it Works
1. Create Your Shared Album & Invite Contributors
Personalize your album and share a link or QR code with loved ones to start collecting images and videos.
2. Collect Photos & Videos
Anyone can contribute from any device.
3. Share Your Album with the Whole Group
Everyone who contributed can view and download the photos and videos in your album (or you can keep it completely private).
Ready to start? Let’s take a deeper dive into how to use Shared Albums for your wedding.
Create Your Shared Album
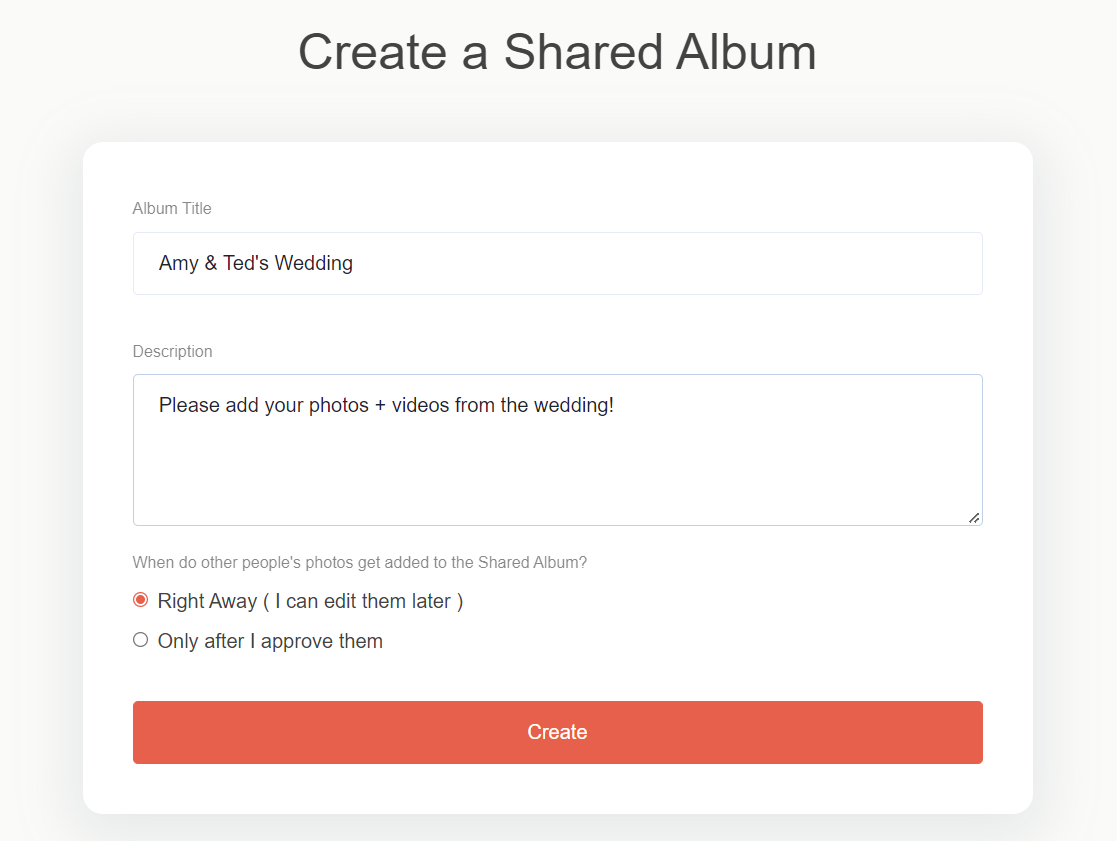
It’s easy to create a Shared Album. Just follow these steps:
- Sign up to create a Shared Album.
- On the Shared Albums page, click the orange “Create Shared Album” button.
- Give your album a Title and enter a Description.
- TIP: Worried someone will upload a photo you don’t want to share? Choose when to add people’s photos: either review and approve photos before they appear in the album or let contributors add them right away.
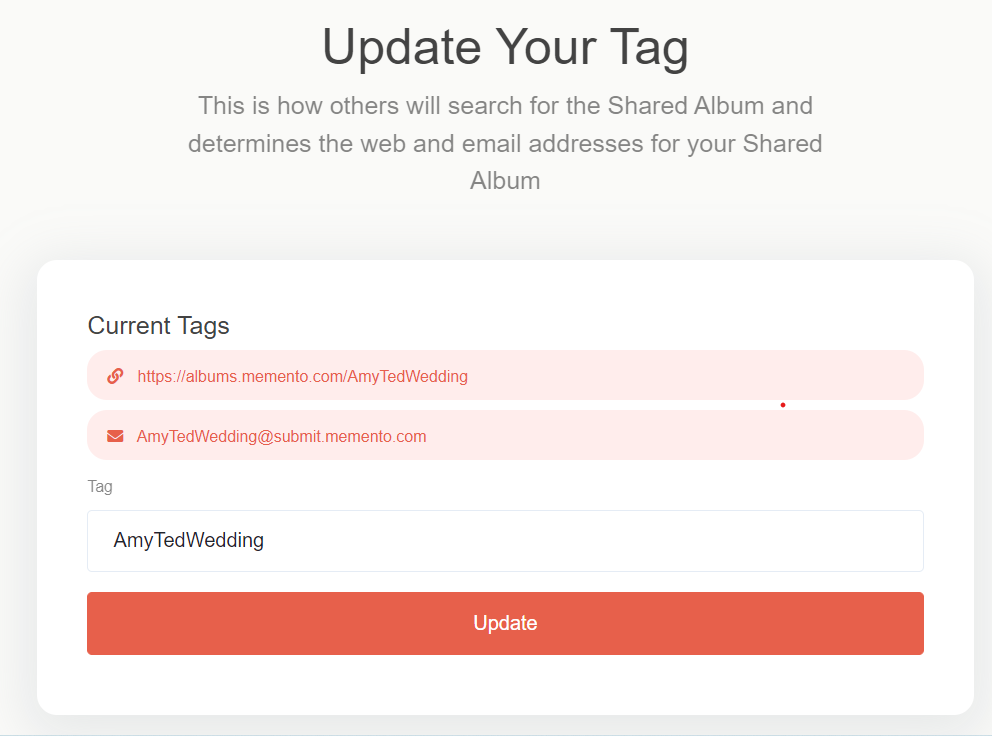
- Update your tag (this is how other people can locate your album). The tag will be used in the link for your album as well as the email address.
- TIP: Tags should be something people will remember and can include the bride and groom’s names or wedding date (like “Jones-Wedding-2022” or “AmyTedWedding”
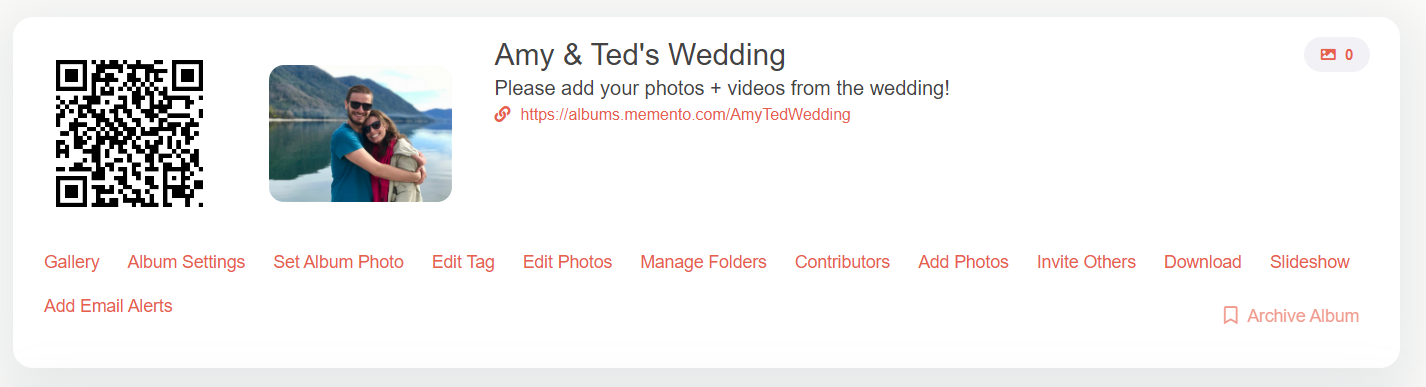
- Set your album photo. Click the “Set Album Photo” link and upload a photo to personalize the album. The photo will display at the top of your gallery to help contributors identify your Shared Album.
Invite Contributors
Now that you’ve created your Shared Album, read on for ways to invite others to contribute their photos and videos.
- After you create your album, you’ll land on the Dashboard page. At the bottom, click the “Invite Others” link.
- You can share your album with others through a QR code, link, and an email address. You can also create a printable invitation.
- Copy your preferred method and paste it into an email, text message, etc. then send it to guests before the big day!
- TIP: An easy way to remind guests to share their photos is with table tents or place cards. Print your QR code on card stock along with instructions on how to upload photos and place them on guests’ tables at your reception.

Customize Your Shared Album
There are tons of ways to customize your Shared Album: easily organize, reorder, and de-dup the photos and videos you receive; edit the album’s social and privacy settings; and create a customized slideshow in seconds.
Album Settings
First, go to your Dashboard (click “Shared Albums” at any time at the top of the page) and from there click “Album Settings” to start organizing.
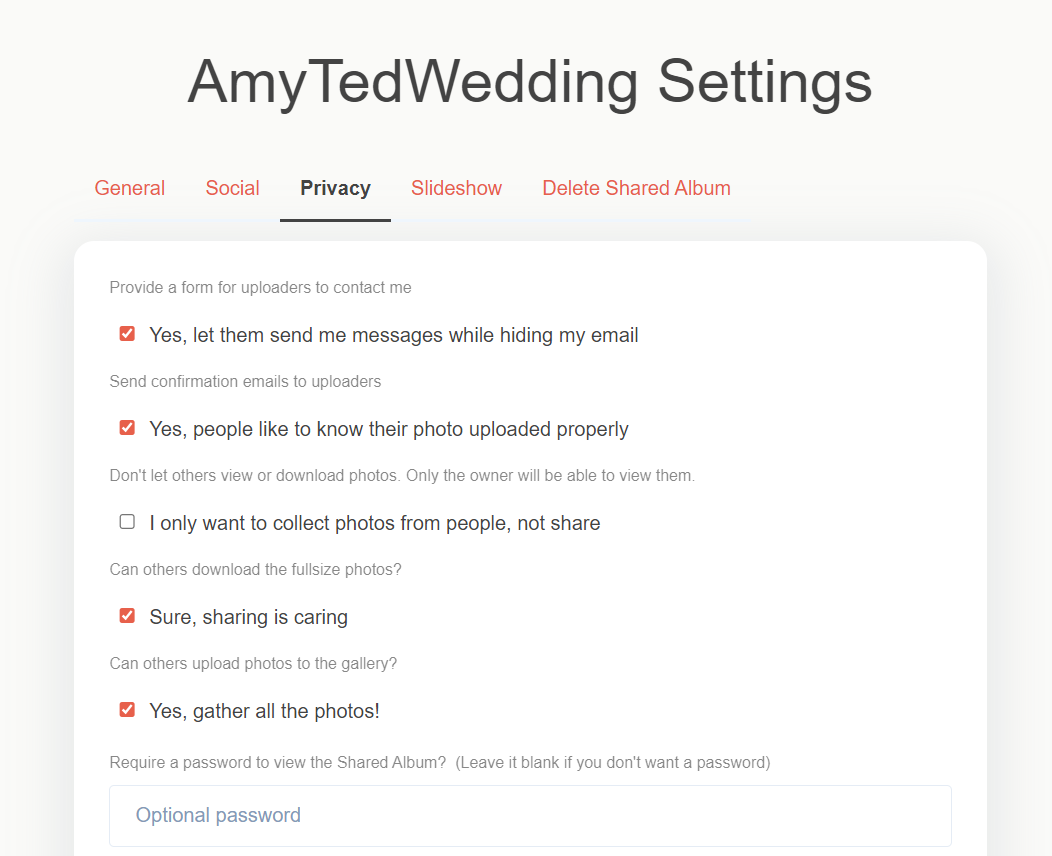
Here are just a few of the settings you can control:
General
- Photo layout (grid styles vs waterfall)
- Photo sort method (date taken, upload date, file name, etc.)
- Group the photos by the person who uploaded them
Social
- Allow comments and likes
- Let people share on Twitter, Facebook, etc.
Privacy
- Send confirmation emails to uploaders
- Let others download full size photos
- Require a password to view the Shared Album
Slideshow
- Set the pause time on photos
- Show or hide photo captions
- Choose background music
- TIP: Shared Albums let you display photos as they’re uploaded in a live, interactive slideshow. Set up a big screen at your reception so guests can see their photos as they post them!

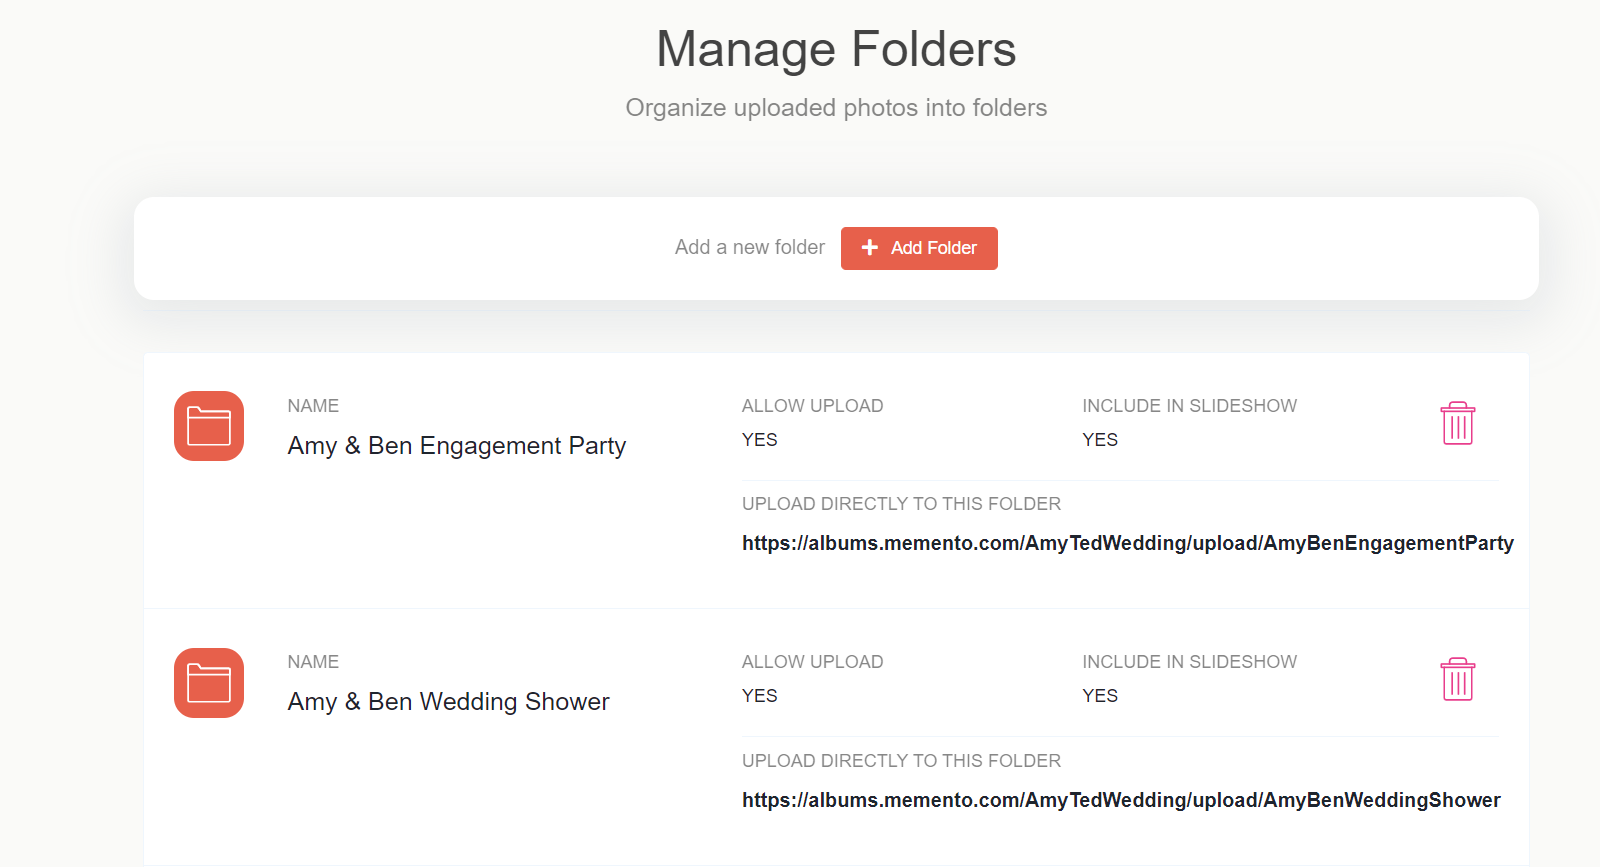
Organize with Folders
If you’ve got a weekend full of wedding festivities, invite guests to upload photos for these events too. Create folders in your Shared Album to capture and organize moments from the rehearsal dinner, getting-ready footage, wedding ceremony, reception, after-party, or post-wedding brunch.
Another alternative is to create folders that will help you commemorate your entire marriage journey. Invite loved ones to upload photos from your engagement party, bridal shower, and bachelor or bachelorette celebration.
To add folders, click “Manage Folders” from your Dashboard and start organizing!
Edit Photos
From your Dashboard, click the “Edit Photos” link to easily add captions to photos, place them into specific folders, and delete duplicates.

Share & Download
One of the best parts about Shared Albums is that you can easily share your album with all the contributors through a link, customizable slideshow, or zip file, and contributors can download high-resolution files from any device!
To download a zip file:
- Go to your Dashboard
- Click the “Download” link
- Click the button to “Download All Files”
- TIP: Photos make wonderful gifts. Download your favorite pictures at the same full resolution whenever you want – days after the wedding or even years! Print and frame them as thank-yous to bridesmaids, groomsmen, and parents or as an anniversary gift for your partner.
Don’t miss a single moment from your big day. Create a Shared Album today to capture precious wedding photos and treasure them for years to come.